Tapering tags & bodies
By Ronn Lucas, Sr.
This discussion deals with methods for building up tags & bodies on fully dressed flies and even the full featherwing streamers.
Presented here is the way I now build up my tags and the bodies on almost all of my flies. First thing to remember is that since I use glass beads on my flies, the tag buildup and body buildup is interrupted by the bead. I would build the tag as I have shown and not worry too much about how big the tie off area is for the various materials comprising the tag and tail because the bead will slide over and hide the tie off area. Now, you certainly can use a bead that butts up to the more conventional method of hiding the area with Ostrich herl. Then of course you are going to need to be careful about your tie offs and building bulk. For this discussion though, it is my way.
I use several materials for my buildups. One is an item called Woolly Nylon (WN) which is a stretch material that you can get at sewing stores. It builds up fast and is very inexpensive. It comes in colours but I use white usually so my lighter coloured flosses will be bright. Next I go over the WN with UNI-Nylon (UN) 210 denier white. This is an unwaxed, untwisted nylon that is quite strong and lays flat as a mill pond on a windless day. I follow that with the same material but the 70 denier version.
Note that all three of these materials must be laid down tightly! If the underbody is loose, your ribs and other materials will deform it when they are applied and look terrible.
You want to roughly establish your taper with the WN and use the UN to fill and smooth out any small ridges or irregularities. I use the UN 70 as my tying thread for the entire body and switch to UNI 8/0 white to tie off the body materials and attach the throat and wings.
If I am using a bead, I do not attach the gut eye until after the tag and tail are completed. Then I put the bead on as in the tying with beads tutorial and then the eye.

Step 1
This shows what the Woolly Nylon looks like in it’s relaxed state.

Step 2
This shows the first layer of the WN and the tip tied in with it. In all of these steps, the turns of the WN or UN are close and tight. Start the WN at just short of the tail tie in area.
Step 3
At the end turn, flatten the WN and make an open turn forward followed by close turns.
Step 4
This shows the tip tie in on the back side of the hook at about the 5:20 position and tug it into about 5:25 when applying the tip. Finish the tip and tie off just above the tie in area of the tip
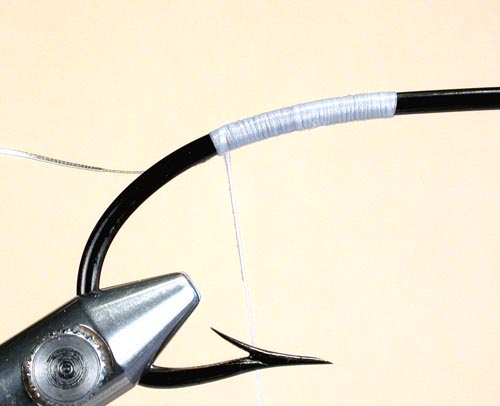
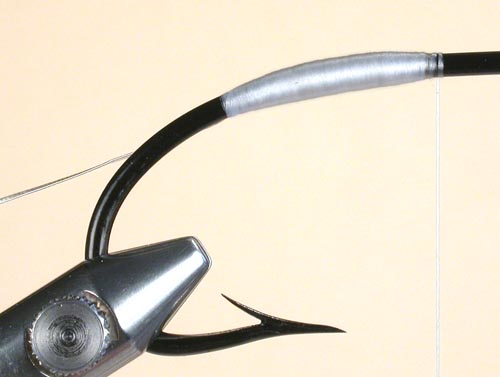
Step 5
Wrap the WN forward and flatten it at the first turn and take a flat turn beyond and open turn back as on the tip. We want to try to get a level tie in area for the tail that is just about at the top of the bend. This way, the tail will look like a continuation of the hook shank or nearly so if the bend is very long.
Step 6
Come back to the tip and do the same flat and then open turn but this time, just short of the tip. This starts to really show the tapering.

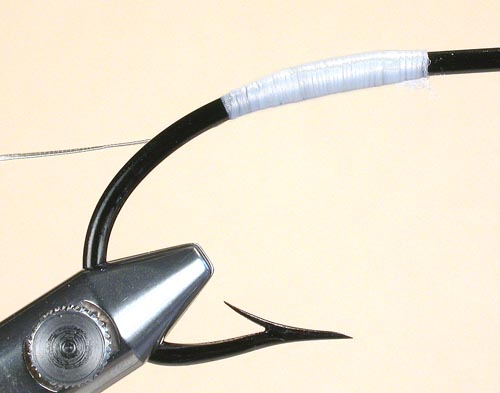
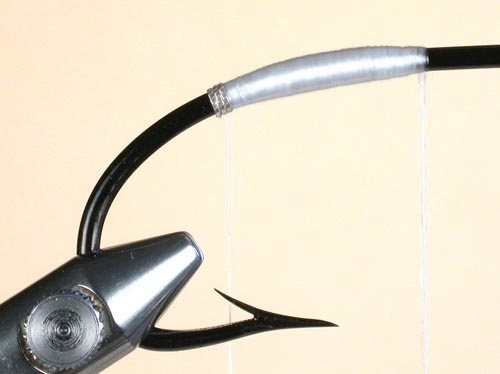
Step 7
This shows the completed WN undertag. Use smooth face pliers and a burnisher to smooth the WN as much as possible.
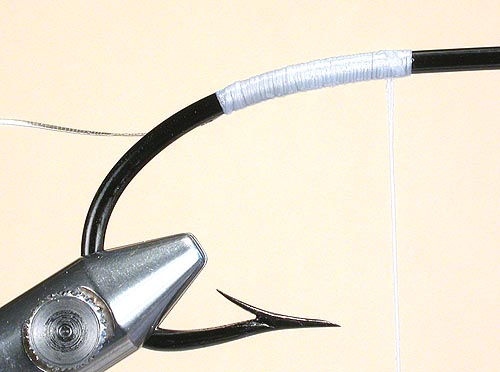
Step 8
This shows the undertag after the UN has been applied. Start slightly ahead of the tie off area of the WN and make flat, touching or overlapping turns just about to the end of the WN and forward again. Tie off, trim and put a dab of cement to lock it in place. Believe me when I say, this is important. The half hitch or even two will come right apart because this stuff is so slippery. It actually did it when I did this tutorial. Smooth the UN with your burnisher.

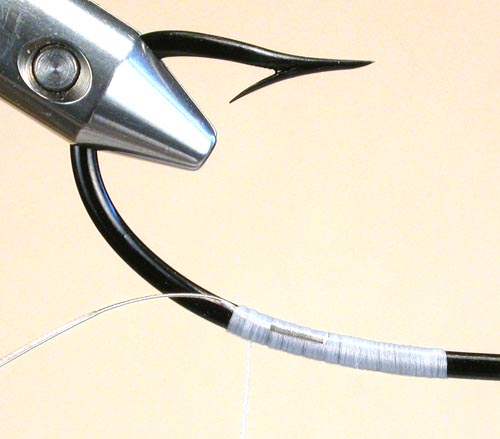
Step 9
This shows the back side of the hook and the fact that there is little noticeable lumps from the tag.
Step 10
Apply the tip. Take the first turn on bare hook and the next turns up the taper. This really makes a good looking tip. You can go to the tag tutorial and see the evolution of my tags.

Step 11
Just do the whole hook as you would the tag. I take my taper close to the eye and make a fairly short taper there because there will be many materials tied off and on in that area and they will bring the diameter of that area up fairly fast. Some guys put a long gradual taper at the front and that is fine too. Mostly is is a matter of personal preference. Since I am usually doing very complex ribbing, I want as much of it as possible showing and it shows best on larger diameters than small.
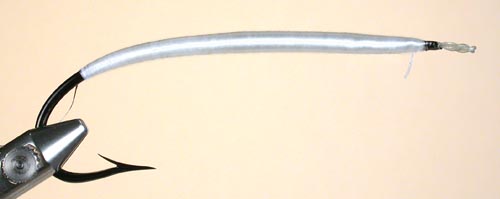
Step 12
This shows the completed underbody with the WN & UN 210 after it has been burnished.
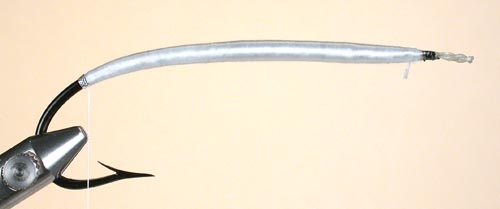
Step 13
Tie in your UN 70 at the rear, wrap the tip and tie off. I use the UN 70 to smooth out the rest on its way forward.
That is about it as far as how I am doing my tapers now. I may change later if I find something I like better but frankly, I doubt I will.
Here is another way of doing a tapered body done by Stefano Farkas for my friend John McLain’s website which has a lot of other good information as well. feathersmc.com
Happy Trails! ~ Ronn Lucas, Sr.