
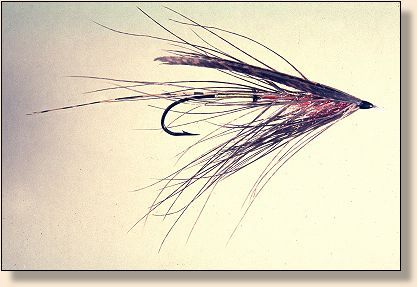
Dunt Dee
The Dunt
Hook: Partridge CS10/1.
Thread: Black.
Tag: Tag: Fine oval silver UNI-Tinsel and light blue UNI-Floss.
Tail: Golden Pheasant, veiled with Teal.
Body: Yellow, orange and red Seal or substitute.
Rib: Flat silver UNI-Tinsel.
Hackle: The original recipe calls for black Heron. Of course, that’s not an option so we must substitute. Use any soft, long barbed feather. Blue Eared Pheasant, a stripped feather as described in the “making Spey hackles” section in this series or, shlapen are a few options. Hackle starts at the claret-red seal.
Wing: Turkey.
Collar: Teal, one turn.
Cheeks: Jungle cock.
Head: Black.
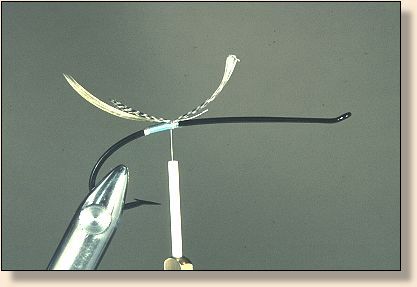
1. As in previous patterns, tie in tag, tail and tail veil.

2. Tie in the ribs as on the Carron although, there are only oval and flat tinsel ribs this time originating from the bottom of the rear of the body.

3. Since we will have a dubbed body on the Dunt, we can cut the waste ends of all prior components. The dubbing will cover any minor bumps. Dub the Yellow and Orange body sections and, attach the hackle by it’s tip.

4. Dub the front (red) section of the body.
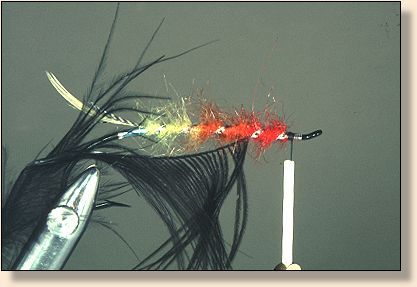
5. Wrap the flat tinsel first in five even turns then, wrap the oval tinsel following the flat. Leave plenty of room at the head for the remainder of the fly.

6. Wrap the hackle directly behind the oval tinsel and, take two or three turns at the head.
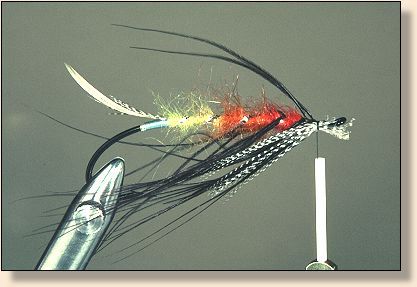
7. You can do the Teal a number of ways. This is one way to tie a throat hackle. First, strip a small bunch of Teal and, tie it to the bottom of the fly with one or two turns of thread. Now, do the same thing on the near and, far side of the fly. Tie the sides high on the sides as shown. This procedure has only consumed six turns of thread and, eliminates the bulk of the feather shaft.

8. Cut waste ends of the Teal and, select two Jungle Cock and, flatten the shafts with smooth faced pliers. If needed, twist the flat portion of the shaft so, it will lay flat on the side of the fly.
9. Tie the far side JC to the side of the fly low, with two separated turns of thread. Do the same on the near side. This has only consumed four or, five turns of thread. You can see, the thrifty use of thread wraps has a direct influence on the size of the finished head on the fly. Try to get into the habit of using just enough turns to secure each material. When we get to the full dressed patterns, you may be attaching 30 more or less individual materials on at the head. If you tied each one off with six or eight turns, even 8/0 thread would be a significant factor on the head size.

10. Select two fairly narrow strips of Turkey tail or other feathers and, tie them in as shown. Do not overlap the butt ends. You want the wings to sit a little elevated by the Spey wing standard and, to the sides. As with the Spey wing, don’t tie the Dee wings over the sides of the fly.
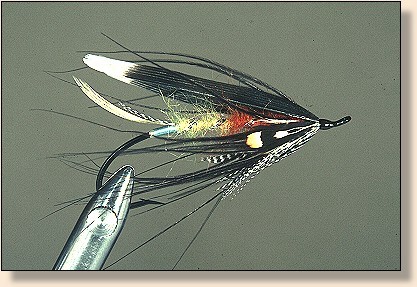
11. The finished fly. I use one or two coats of black (usually although, there are other colors I use sometimes) fingernail polish followed by two or three clear coats. The black will cover any defects in thread wraps and, the clear will give the head a glossy depth. Do thin coats rather than trying to do the heads in one step, the flies will look better being built up.
Here are more flies tied the same method.

Dee Wing Fly by Fred Brand

Power House by Ronn Lucas Sr
Daffy by Ronn Lucas Sr
As always, I am happy to answer any questions you might have about these patterns. You can reach me at Ronn or 503-654-0466.
Happy Trails! ~ Ronn Lucas, Sr.